今回は、スーパーバイザー クラスタで vSphere Pod を起動します。
前回はこちら。
一連の投稿のまとめはこちら。
今回の内容です。
- スーパーバイザー クラスタへのログイン(再掲)
- vSphere Pod の起動確認(kubectl run)
- vSphere Pod の起動確認(kubectl apply)
- vSphere Pod の削除
スーパーバイザー クラスタへのログイン(再掲)
今回は、vCenter の名前空間で特にアクセス権限を付与していないので、デフォルトでアクセス可能になっている administrator@vsphere.local ユーザでログインします。
接続先は、vCenter ではなく、Supervisor Control VM にアクセスできる VIP アドレス「192.168.70.33」です。さきほどの 「Kubernetes CLI Tools」ページと同じアドレスになるはずです。証明書エラーを回避するため、「--insecure-skip-tls-verify」を指定しています。
gowatana [ ~ ]$ kubectl vsphere login --insecure-skip-tls-verify --server=192.168.70.33

Username: administrator@vsphere.local ★ユーザ名を入力
Password: ★パスワード入力
Logged in successfully.

You have access to the following contexts:
   192.168.70.33
   lab-ns-01
   lab-ns-02

If the context you wish to use is not in this list, you may need to try
logging in again later, or contact your cluster administrator.

To change context, use `kubectl config use-context <workload name>`
利用可能な Context が表示されるので、名前空間「lab-ns-01」にアクセスできる、同名のコンテキストに切り替えます。
gowatana [ ~ ]$ kubectl config use-context lab-ns-01
Switched to context "lab-ns-01".
vSphere Pod の起動確認(kubectl run)
まずは、kubectl コマンドで CentOS 7 のコンテナを Kubernetes の Pod として起動してみます。下記のようなオプション指定で、まずは コンテナが起動できることだけ確認します。
- コンテナ イメージは centos:7 を Docker Hubからダウンロードしています。
- 「-it」 オプションで起動したコンテナにそのまま接続しています。
- 「--rm」オプションで、コンテナから抜けた(exit した)際に、Pod を削除します。
コンテナを起動し、そのまま接続して、CentOS であることを確認してみました。
gowatana [ ~ ]$ kubectl run -it --image=centos:7 --generator=run-pod/v1 --rm centos
If you don't see a command prompt, try pressing enter.
[root@centos /]# ★ここからコンテナの中。
[root@centos /]#
[root@centos /]# cat /etc/centos-release
CentOS Linux release 7.8.2003 (Core)
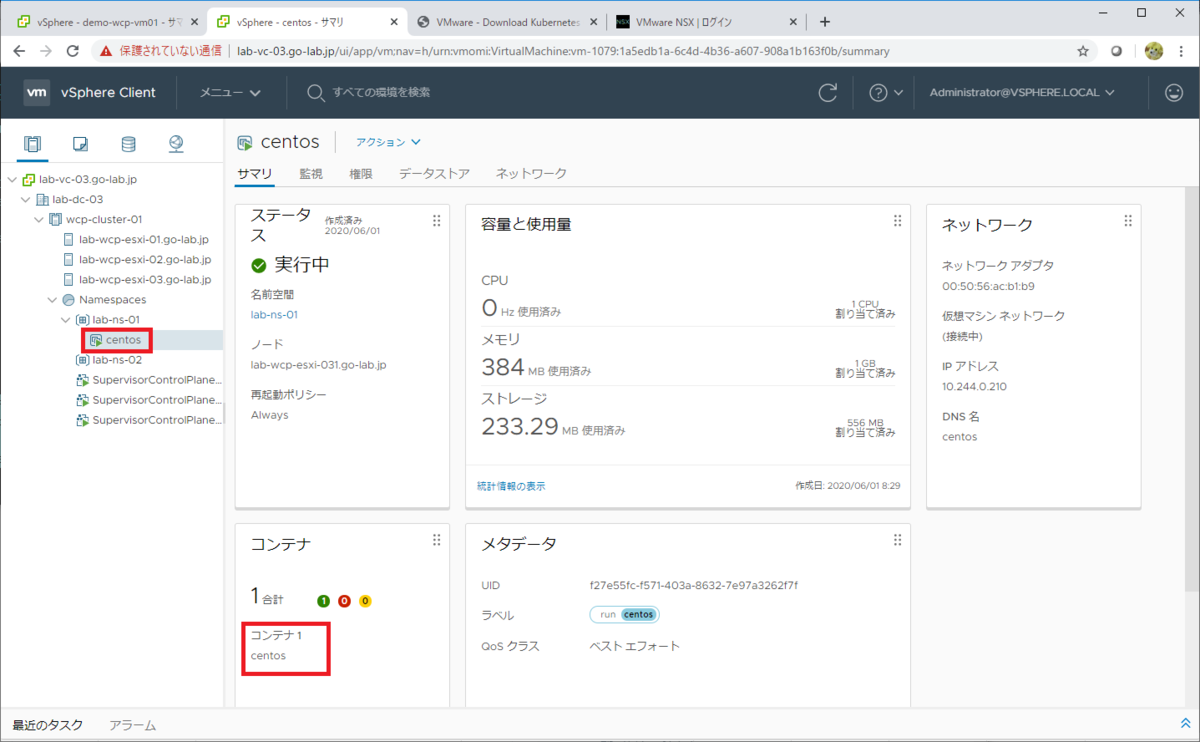
この状態で vSphere Client から名前空間「lab-ns-01」を確認すると、「centos」という名前のコンテナを含む Pod が作成、起動されています。

exit で抜けると、「--rm」オプションにより自動的にコンテナは削除されます。
[root@centos /]# exit
exit
Session ended, resume using 'kubectl attach centos -c centos -i -t' command when the pod is running
pod "centos" deleted
gowatana [ ~ ]$
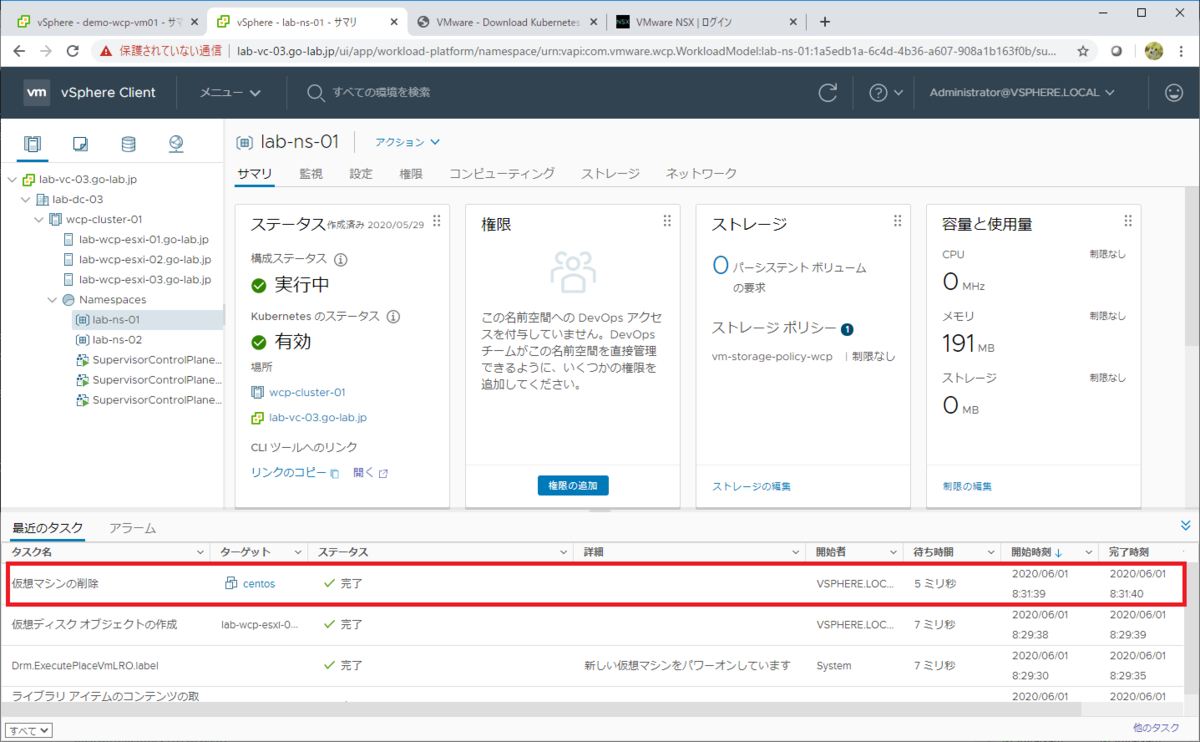
vSphere Client でも、Pod が削除される様子が確認できます。ちなみに、タスク名が「仮想マシンの削除」なのは、vSphere Pod では Pod が仮想マシンとして起動されているためです。

vSphere Pod の起動確認(kubectl apply)
Kubernetes へのコンテナの展開は、実際には YAML ファイルを利用するのが一般的です。そこで、YAML ファイルを用意して Pod を起動してみます。
下記のような nginx-pod.yml ファイルを用意します。nginx イメージによる nginx-container コンテナ 1つを含む、nginx-pod という Pod を作成します。
nginx-pod.yml ファイルは、たとえば vi などのテキスト エディタで作成するか・・・
gowatana [ ~ ]$ vi nginx-pod.yml
もしくは下記のように ファイルを作成します。
gowatana [ ~ ]$ cat << EOF > nginx-pod.yml
> ---
> kind: Pod
> apiVersion: v1
> metadata:
>   name: nginx-pod
>   labels:
>     app: wcp-demo
> spec:
>   containers:
>   - image: nginx
>     name: nginx-container
> EOF
gowatana [ ~ ]$ cat ./nginx-pod.yml
---
kind: Pod
apiVersion: v1
metadata:
  name: nginx-pod
  labels:
    app: wcp-demo
spec:
  containers:
  - image: nginx
    name: nginx-container
kubectl apply コマンドで YAML ファイルを指定して、Pod を起動してみます。
gowatana [ ~ ]$ kubectl apply -f nginx-pod.yml
pod/nginx-pod created
Pod の起動が、kubectl で確認できます。
gowatana [ ~ ]$ kubectl get pods
NAME        READY   STATUS    RESTARTS   AGE
nginx-pod   1/1     Running   0          40s
vSphere Client でも、Pod が起動された様子が確認できます。

ちなみに、今回はただ Pod を起動しただけなので、Nginx の Web サービスにアクセスするには別途 Service リソース作成などが必要です。
vSphere Pod は NSX-T を前提としており、kubectl での操作に合わせて NSX によるネットワークが自動的に設定変更されます。(これについては別途・・・)
vSphere Pod の削除
kubectl delete コマンドで Pod を削除すると、vSphere Client でも Pod が削除された様子がわかるはずです。
gowatana [ ~ ]$ kubectl delete pod -f nginx-pod.yml
pod "nginx-pod" deleted
このように、vSphere with Tanzu のスーパーバイザー クラスタでの Kubernetes リソース操作については、vSphere Client ではなく、基本的に kubectl を利用します。
以上、スーパーバイザー クラスタに kubectl でアクセスして Pod を起動してみる話でした。
次は・・・