vCenter Server 8.0 U2c で、vCenter Server プロファイルをエクスポートしてみます。
前回はこちら。
今回の内容です。
- 今回の実行環境
- 1. API Key(vmware-api-session-id)の取得
- 2. vCenter Server プロファイルのエクスポート
- 3. vCenter Server プロファイルの編集
- 4. vCenter Server プロファイルのインポート
今回の実行環境
今回は、Linux マシンから curl と jq を使用して操作します。
# cat /etc/photon-release
VMware Photon OS 5.0
PHOTON_BUILD_NUMBER=dde71ec57
作業で利用するツールをインストールしておきます。
- jq: JSON データの操作、エスケープ解除など
- diffutils:ファイル編集の差分確認で diff を利用するため
# tdnf install jq diffutils -y
1. API Key(vmware-api-session-id)の取得
はじめに、vmware-api-session-id として指定する API Key を取得します。ついでに、接続情報をシェル変数として設定しておきます。
API のエンドポイントとなる vCenter のアドレス、ユーザ、パスワードを変数に設定しておきます。
- vCenter のアドレス: lab-vc-01.go-lab.jp
- ユーザ: administrator@vsphere.local
- パスワード: VMware1!
# VC=lab-vc-01.go-lab.jp
# USER=administrator@vsphere.local
# PASS='VMware1!'
vmware-api-session-id は、下記のメソッドで取得できます。
- POST /api/session
# curl -k -s -X POST --url "https://$VC/api/session" -u "$USER:$PASS"
このあとのコマンドラインで利用するため、変数に格納しておきます。ここでの jq は、ダブル クオートを外すためだけに併用しています。
# SESSID=$(curl -k -s -X POST --url "https://$VC/api/session" -u "$USER:$PASS" | jq -r .)
下記のような ID を取得できます。
# echo $SESSID
8abce094182276bafdac75efdab6afc7
2. vCenter Server プロファイルのエクスポート
vCenter Server プロファイルは、下記のようにエクスポートします。
- POST /api/appliance/infraprofile/configs?action=export
# curl -k -X POST \
--url "https://$VC/api/appliance/infraprofile/configs?action=export" \
-H "content-type: application/json" \
-H "vmware-api-session-id: $SESSID"
ここで取得できる JSON データは、エスケープあり、改行 / フォーマットなしの状態になっています。
あまりに JSON データの分量が大きいので、ファイル(vc-infraprofile.txt)に保存します。
# curl -k -X POST \
--url "https://$VC/api/appliance/infraprofile/configs?action=export" \
-H "content-type: application/json" \
-H "vmware-api-session-id: $SESSID" > vc-infraprofile.txt
3. vCenter Server プロファイルの編集
今回は、vCenter Server プロファイルで Syslog 転送先を設定してみます。
まず、編集しやすくするために JSON データを整形します。JSON データからエスケープを外し、見やすくフォーマットして表示すると、下記のようになります。
# cat vc-infraprofile.txt | jq '. | fromjson' > vc-infraprofile.json
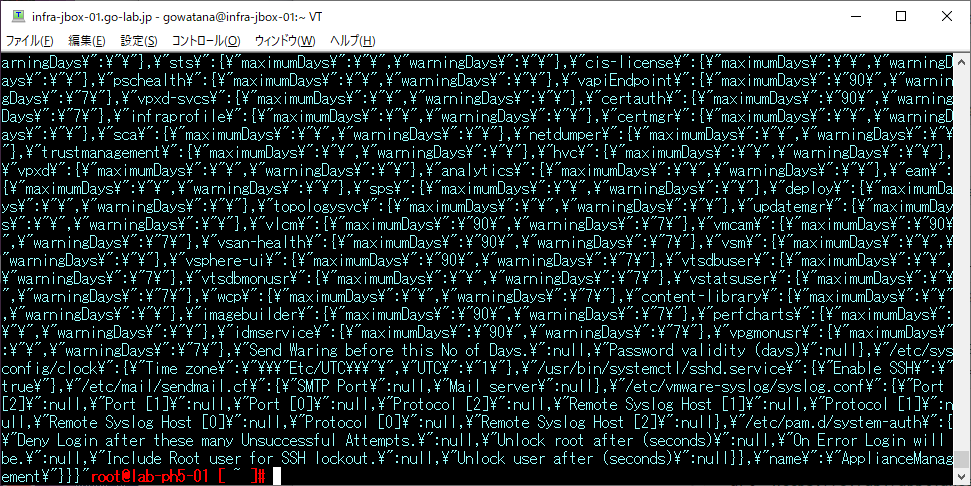
フォーマット済みの JSON データの例です。
ファイルを編集するためにコピーします。
# cp vc-infraprofile.json vc-infraprofile_syslog.json
テキスト エディタで JSON ファイルを編集し、Syslog 転送先を記載します。
# vi vc-infraprofile_syslog.json
今回の編集差分です。
# diff vc-infraprofile.json vc-infraprofile_syslog.json
差分の内容です。
編集した JSON ファイルを、エスケープされて改行なしの状態に戻します。
# cat vc-infraprofile_syslog.json | jq @json > vc-infraprofile_syslog.txt
4. vCenter Server プロファイルのインポート
Syslog 転送先を追記した vCenter Server プロファイルを、インポートするための JSON 形式にあわせて、さらに編集します。
編集にむけて、ファイルをコピーしておきます。
# cp vc-infraprofile_syslog.txt vc-infraprofile_syslog_edit.txt
ファイルを編集します。
# vi vc-infraprofile_syslog_edit.txt
下記の形式になるように、ファイルを編集します。
{
"config_spec": <エスケープされた JSON(vc-infraprofile_syslog.txt の内容)>
}
下記のメソッドで、編集した JSON の形式が正しいことを確認します。
- POST /api/appliance/infraprofile/configs?action=validate&vmw-task=true
# curl -k -X POST \
--url "https://$VC/api/appliance/infraprofile/configs?action=validate&vmw-task=true" \
-H "content-type: application/json" \
-H "vmware-api-session-id: $SESSID" \
-d@vc-infraprofile_syslog_edit.txt
VCSA の下記のログ ファイルを確認すると、下記のような確認結果が確認できます。
- /var/log/vmware/infraprofile/infraprofile-svcs.log
2024-04-12T15:53:45.943Z [Thread-167 INFO com.vmware.appliance.infraprofilev1.plugins.ConfigValidationLogic opId=] Start validating port 514 of key Port [0] and file /etc/vmware-syslog/syslog.conf
2024-04-12T15:53:45.944Z [Thread-167 INFO com.vmware.appliance.infraprofilev1.plugins.ConfigValidationLogic opId=] validating port 514 of key Port [0] of file 514
2024-04-12T15:53:45.944Z [Thread-167 INFO com.vmware.appliance.infraprofilev1.plugins.ApplianceManagementPlugin opId=] List of notification after config value validation:
2024-04-12T15:53:45.944Z [Thread-167 INFO com.vmware.appliance.infraprofilev1.plugins.ApplianceManagementPlugin opId=] ApplianceManagement properties validation completed final list of notification is : ValidationResult (com.vmware.appliance.infraprofile.configs.validation_result) => {
status = VALID,
notifications = Notifications (com.vmware.appliance.infraprofile.notifications) => {
info = <null>,
warnings = ,
errors =
}
}
2024-04-12T15:53:45.970Z [Thread-167 INFO com.vmware.appliance.infraprofilev1.core.VCProfilesProvider opId=] End: validation took 126ms
vCenter Server プロファイルをインポートします。
- POST /api/appliance/infraprofile/configs?action=import&vmw-task=true
# curl -k -X POST \
--url "https://$VC/api/appliance/infraprofile/configs?action=import&vmw-task=true" \
-H "content-type: application/json" \
-H "vmware-api-session-id: $SESSID" \
-d@vc-infraprofile_syslog_edit.txt
VCSA の下記のログ ファイルを確認すると、インポートの完了が確認できます。
- /var/log/vmware/infraprofile/infraprofile-svcs.log
2024-04-12T15:17:44.839Z [Thread-124 [] INFO com.vmware.appliance.infraprofilev1.core.VCProfilesProvider opId=] End: Import took 18049ms
VCSA で vCenter Server Appliance Management Interface(VAMI)を開くと、Syslog 転送先が vCenter Server プロファイルのとおりに設定されたことが確認できます。

以上、vCenter Server プロファイルを使用してみる話でした。