VMware Cloud Foundation(VCF)5.2.1 の VI Workload Domain で構成した vSphere Supervisor に kubectl で接続してみます。
今回の内容です。
前回はこちら。
今回の環境
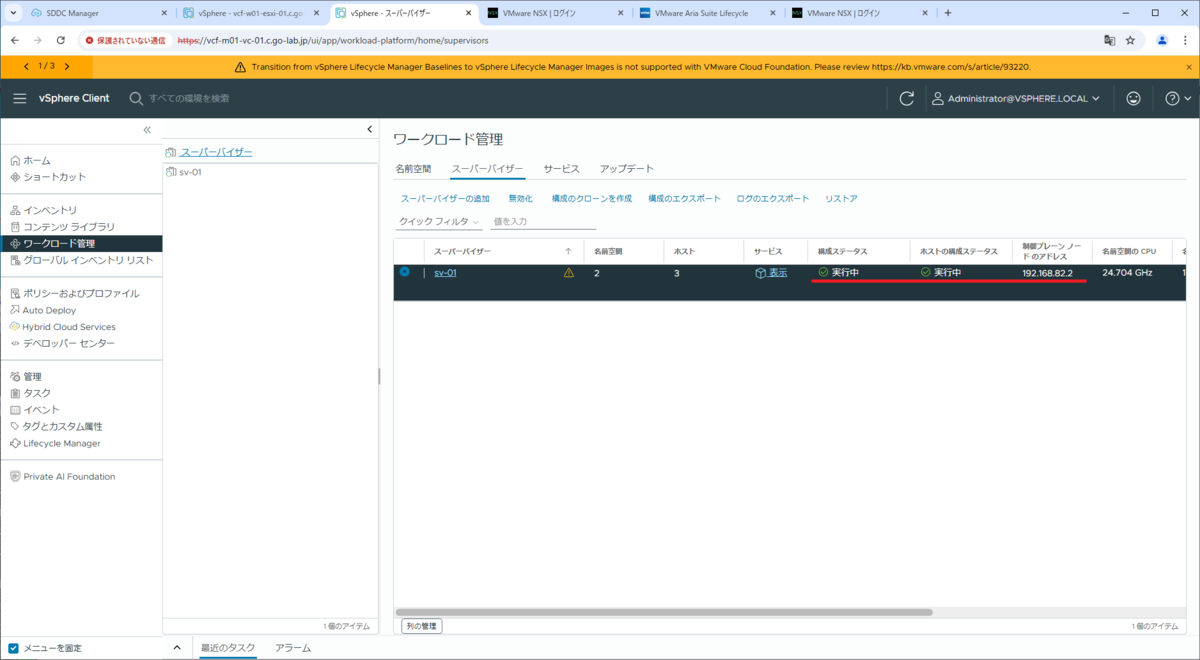
vCenter Server 8.0 U3d で、スーパーバイザーを構築してあります。
スーパーバイザー制御プレーンの IP アドレスは、192.168.82.2 です。

今回は Linux マシン(VMware Photon OS 5.0)から kubectl でスーパーバイザーに接続してみます。
# cat /etc/photon-release
VMware Photon OS 5.0
PHOTON_BUILD_NUMBER=dde71ec57
Photon OS には、root ユーザで unzip をインストールしておきます。
# tdnf install unzip -y
kubectl と vSphere Plugin のダウンロード
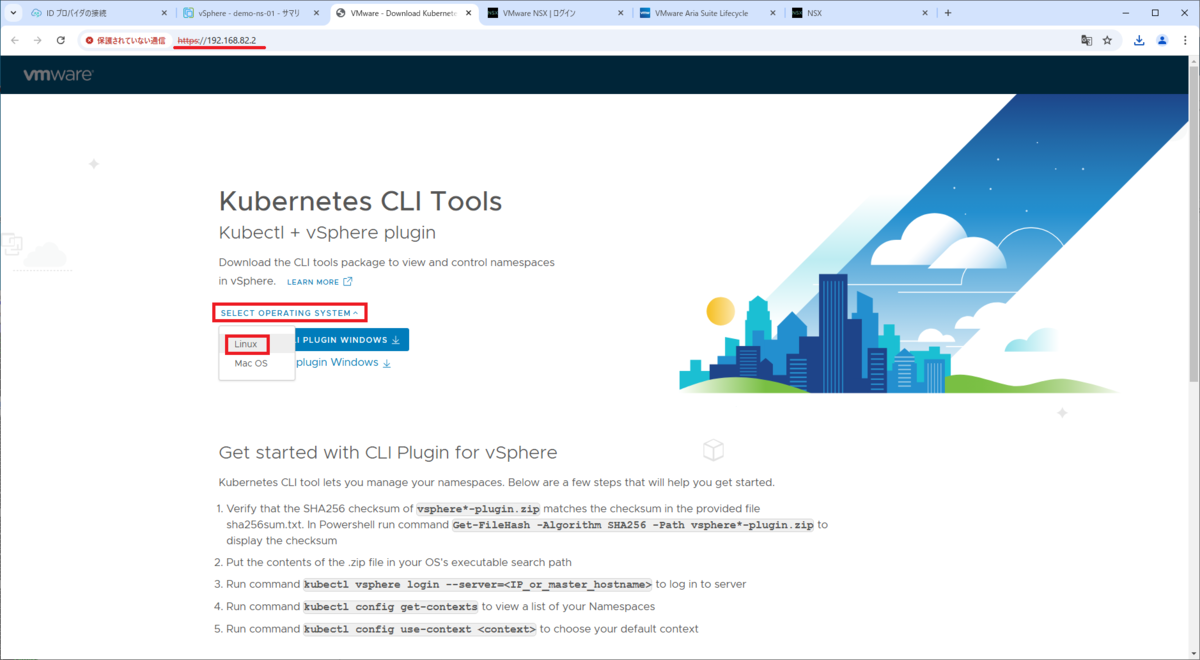
Web ブラウザからスーパーバイザー制御プレーンの IP アドレス(192.168.82.2)に HTTPS でアクセスして、ダウンロード ページを表示します。
kubectl と vSphere Plugin のダウンロード URL を確認するため、「SELECT OPERATING SYSTEM」→「Linux」を選択します。

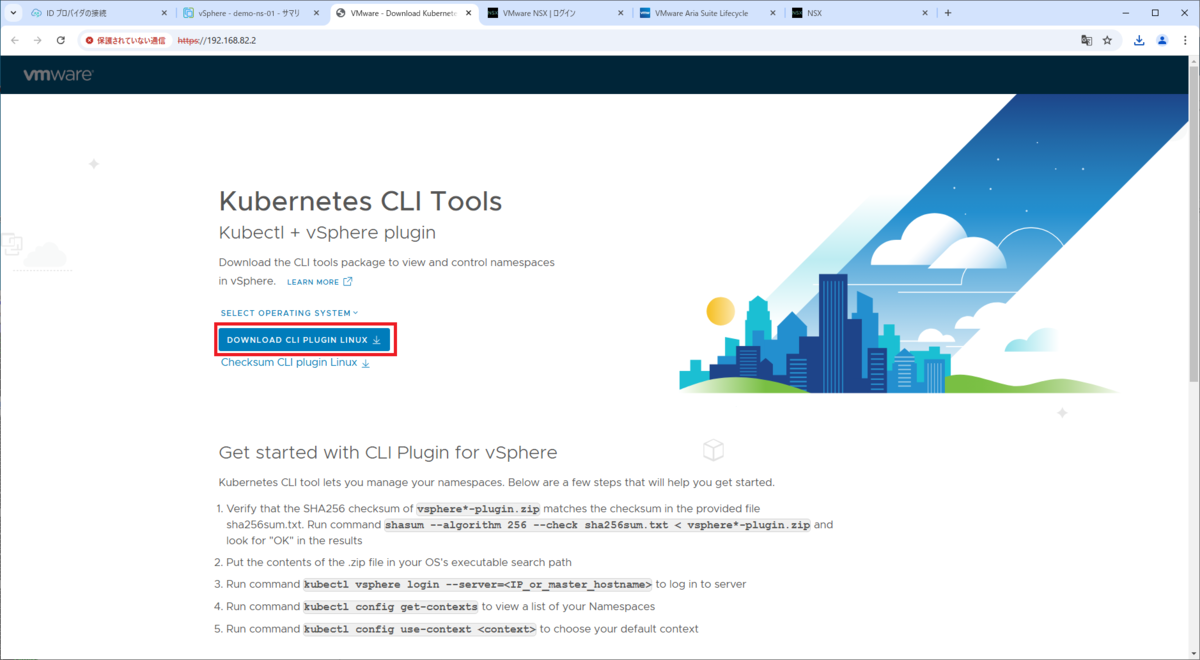
「DOWNLOAD CLI PLUGIN LINUX」ボタンを右クリックして、リンクのアドレスをコピーしておきます。ちなみに、URL 下記のようになります。
- https://制御プレーンの IP アドレス/wcp/plugin/linux-amd64/vsphere-plugin.zip

Linux マシンで、kubectl の .zip ファイルをダウンロードします。
gowatana [ ~ ]$ curl -kOL https://192.168.82.2/wcp/plugin/linux-amd64/vsphere-plugin.zip
2. kubectl と vSphere Plugin のインストール
ダウンロードした .zip ファイルを展開します。
gowatana [ ~ ]$ unzip vsphere-plugin.zip
Archive:  vsphere-plugin.zip
  inflating: bin/kubectl-vsphere
  inflating: bin/kubectl
kubectl と、kubectl-vsphere が保存されているディレクトリを、PATH 環境変数に追加します。
gowatana [ ~ ]$ export PATH=$HOME/bin:$PATH
gowatana [ ~ ]$ echo 'export PATH=$HOME/bin:$PATH' >> $HOME/.bash_profile
kubectl が実行できることを確認しておきます。まずは、kubectl のバージョンを確認します。
gowatana [ ~ ]$ kubectl version --client
Client Version: v1.29.7+vmware.wcp.1
Kustomize Version: v5.0.4-0.20230601165947-6ce0bf390ce3
kubectl の vSphere Plugin のバージョンを確認します。
gowatana [ ~ ]$ kubectl vsphere version
kubectl-vsphere: version 0.1.10, build 24211112, change 13956219
kubectl の Bash 補完機能を有効化しておきます。
gowatana [ ~ ]$ source <(kubectl completion bash)
gowatana [ ~ ]$ echo 'source <(kubectl completion bash)' >> $HOME/.bash_profile
3. スーパーバイザーへの接続
kubectl vsphere login で、スーパーバイザーに接続します。今回は、vCenter の管理者ユーザー(Administrator@vsphere.local)を使用します。
kubectl vsphere login \
--server 192.168.82.2 \
--vsphere-username Administrator@vsphere.local \
--insecure-skip-tls-verify
実際に実行すると、下記のようになります。
gowatana [ ~ ]$ kubectl vsphere login --server 192.168.82.2 --vsphere-username Administrator@vsphere.local --insecure-skip-tls-verify Password: ★パスワードを入力 Logged in successfully. You have access to the following contexts: 192.168.82.2 svc-tkg-domain-c9 svc-velero-domain-c9 If the context you wish to use is not in this list, you may need to try logging in again later, or contact your cluster administrator. To change context, use `kubectl config use-context`
スーパーバイザーに接続すると、kubectl のコンテキストは、デフォルトではスーパーバイザー制御プレーンの IP と同名のものが使用されます。
gowatana [ ~ ]$ kubectl config current-context
192.168.82.2
kubeconfig には、vSphere 名前空間と同名のコンテキストが自動登録されます。
gowatana [ ~ ]$ kubectl config get-contexts
CURRENT   NAME                   CLUSTER        AUTHINFO                                       NAMESPACE
*         192.168.82.2           192.168.82.2   wcp:192.168.82.2:Administrator@vsphere.local
          svc-tkg-domain-c9      192.168.82.2   wcp:192.168.82.2:Administrator@vsphere.local   svc-tkg-domain-c9
          svc-velero-domain-c9   192.168.82.2   wcp:192.168.82.2:Administrator@vsphere.local   svc-velero-domain-c9
スーパーバイザーを構成する Kubernetes ノードの一覧を確認しておきます。
gowatana [ ~ ]$ kubectl get nodes
NAME                               STATUS   ROLES                  AGE   VERSION
4202442cb4a6d5d93258c808997ef195   Ready    control-plane,master   31h   v1.29.7+vmware.wcp.1
420249ef67062bbda31da74b123a24b0   Ready    control-plane,master   31h   v1.29.7+vmware.wcp.1
420254153ad943bb552598ad776c377f   Ready    control-plane,master   22h   v1.29.7+vmware.wcp.1
vcf-w01-esxi-01.c.go-lab.jp        Ready    agent                  22h   v1.29.3-sph-c8e42be
vcf-w01-esxi-02.c.go-lab.jp        Ready    agent                  22h   v1.29.3-sph-c8e42be
vcf-w01-esxi-03.c.go-lab.jp        Ready    agent                  22h   v1.29.3-sph-c8e42be
下記のように kubectl vsphere logout を実行すると、login で生成された kubeconfig のコンテキストを削除できます。
gowatana [ ~ ]$ kubectl vsphere logout
Logged out of all vSphere namespaces.
つづく。